Building your first home studio is more accessible nowadays than it’s ever been before. The digital era has provided aspiring producers with boat loads of information right at their fingertips. That said, the process is still up to you to perform on your own, with a little help from articles like this one, of course.
If you’re a total newbie to the world of music production, then building your first home recording studio might seem like a daunting task. The truth is, there are only a few key ingredients in the home studio recipe.
In this article, we’re going to go over just how easy it is to start making music in a home studio environment. The best part is, you can even do this on a tight budget.
First Things First
Before we go any further, it’s important to keep in mind that this article is meant to show you how to build a simple “bedroom” studio. For most beginners, this is where you should start anyway.
That being said, you shouldn’t feel like this is the endgame for your studio journey.
Go ahead and invest in some affordable pieces of equipment and start making music, but leave room for growth. You’re very likely to expand upon your list of studio equipment as you gain more skill and experience.
Also, just because you’re building your first budget home studio doesn’t mean that you should go for the cheapest gear you can find. Moreover, don’t cut corners with any of your equipment because you’ll only be limiting yourself.
There’s a fine line between “cheap” gear and gear that’s within your budget.
It’s important that you research the gear you’re interested in thoroughly so you know that it will serve you well as you learn how to make music in a home studio environment.
Consider Your Home Studio Space
The first factor to take into consideration is where your physical studio space will exist. For many beginner producers, this will most likely be your bedroom. That’s all well and good, but if you want to record vocals or any audio source of any kind, you’ll have a tough time doing so in a bedroom.
If you have a spare room or basement, it’s highly recommended that you build your home studio there instead.
If that’s out of the question, then consider putting vocal recordings on the backburner until you can cut out an adequate space. You can get away with using your closet or a portable isolation shield for vocal recordings in a bedroom studio, but it’s certainly not ideal.
As you get into the later stages of this article, you’ll have to add some acoustic treatment to your studio space as well, but we’ll get into that when the time comes.
How To Build A Budget Home Studio In 8 Easy Steps
Alright, it’s time for us to dive into the step-by-step process of piecing together a home studio on a tight budget.
We’ll break things down into individual pieces of equipment, each representing a bite-sized goal that you can strive to achieve one-by-one. Without further ado, let’s start piecing together your first home studio.
Step 1: Studio Desk
It goes without saying that you need a place where you can place all of the rest of your studio gear. The foundation of your studio will always be your desk, so this is the first huge step you’ll take.
For a budget home studio setup, you don’t need a huge desk by any means. It would be smart to get a studio desk that’s big enough for future expansions, but that’s only if you can afford to.
For now, you can get away with a simple computer desk that’s sturdy and one that sits at an adequate height.
Step 2: Computer
Next up, you have a studio computer. Obviously, you won’t get very far with making digital music without a powerful computer, so this is probably the most important investment you’ll make.
Now, some new producers think that they can go out and get any old computer and call it good.
This is definitely not the case.
With that, here are the minimum recommended computer specs to look for when shopping around:
- CPU: 2.4Ghz multi-core processor (Intel i5 or higher; AMD Ryzen 5 or higher).
- Memory: 8GB or higher.
- Operating System: 64-bit operating system.
- Internal Storage: 500GB SSD (avoid internal HDD).
- External Storage: An additional 500GB of storage for your samples should be sufficient; this can be either SSD or HDD.
- Screen/Monitor Size: 13” or larger.
- Graphics: The built-in graphics card is just fine.
Modern music production software is very demanding on a computer. It’s important that you follow those specification guidelines to choose a proper studio computer.
This is most definitely an area that you don’t want to cut corners on. Otherwise, you’re simply wasting your own time and money. Choose the right computer the first time, and you’re off to the races from there.
Step 3: Digital Audio Workstation (or DAW)
A DAW is where all of the magic happens in a music production studio. This amazing piece of software is where you record, manipulate, monitor and edit all of the audio flowing through your gear. This is literally where all of your “productions” occur.
The truth is that most modern DAWs do the same thing. The differences lie within the user interfaces and stock plugins.
Choosing a DAW is a very subjective matter. It all boils down to what works best for you as well as what stock VST plugins are most appealing to you.
For example, some producers swear by FL Studio. It’s one of the oldest DAWs and it comes with a plethora of amazing stock plugins. With that, other producers strongly dislike its user interface. They say it’s too cluttered and not streamlined enough.
On the other hand, another popular DAW is Ableton Live. It has a clean and basic user interface that works better for certain producers’ workflows.
Again, this is a decision that’s entirely up to you.
To help you start your DAW research, here’s a quick list of the most popular DAWs on the market:
- FL Studio
- Ableton Live
- Pro Tools
- Studio One
- Logic Pro X (only on Mac)
- Reaper
There are a few more out there, but those are the ones to check out first.
Keep in mind that many of those brands offer either a trial or a free version of their DAW for you to try out.
If you start to feel lost, then head over to the DAWs website and see if they offer a simple version of their software.
Also, there are a number of great recording studio starter bundles available on the market. These bundles typically give you a microphone, an audio interface, some headphones and a basic version of a DAW. Really everything you need to get started.
This is yet another way to try out a particular DAW for free before making your final decision. That way you’re not shelling out a bunch of cash on a product that might not suit your specific workflow.
Step 4: Audio Interface
Your next big investment is a high-quality audio interface. Your audio interface will be the central hub of your studio setup.
An audio interface is a powerful piece of hardware that connects your microphones, headphones, studio monitors and instruments to your computer. Without an audio interface, you wouldn’t be able to record or playback high-fidelity audio.
Modern audio interfaces can do multiple jobs at once, but the most important one is to bring your microphones up to line-level (with the help of mic preamps) for recording. That being the case, you need to decide how many inputs and outputs you’ll need for your future recordings.
In most budget home studios, an input/output count of 2×2 should suffice. That gives you two XLR or line inputs, and two line outputs for your studio monitors.
In addition, look for an audio interface that offers a headphone jack and an internal headphone amplifier for your studio headphones.
As far as budget audio interfaces go, the Behringer UMC22 is a super affordable option. If you can stretch your budget a bit farther, then go for the Focusrite Scarlett 2i2 (or something similar) instead.
Step 5: Studio Headphones
With this next piece of equipment, you’ll be getting really close to having a fully functional home studio. Studio headphones give you the ability to monitor your audio in detail, and in real-time.
There are two considerations here: closed-back headphones or open-back headphones.
For a beginner studio, closed-back headphones are a perfect place to start. Open-back headphones are better suited for intricate mixing and mastering processes, and you should get a pair when you’re at that stage.
For now, a decent pair of closed-back headphones will serve you well for tracking and monitoring your recordings. They’re also most ideal for writing arrangements in your DAW.
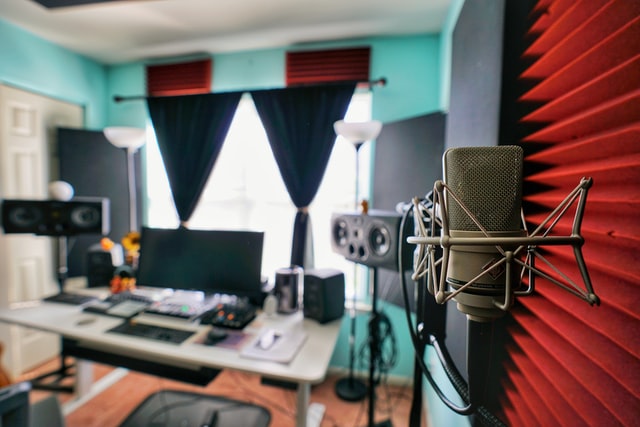
Step 6: Studio Microphone
Now that you have an audio interface and some headphones, you’re ready to start recording audio.
Now, there are numerous types of microphones that are suitable for different recording applications.
Now is the time to consider what it is you want to record.
Will you be recording vocals or instruments or both?
If you’re just planning to record vocals, get yourself a decent large-diaphragm condenser microphone. If you’re recording instruments, a cardioid dynamic microphone — like the famous Shure SM57 — is pretty universal.
If you’re going to do both, then you can shell out a little more money for a versatile condenser microphone, like the Rode NT1A for instance. Alternatively, the Shure SM7B is probably the most versatile microphone on the market.
Don’t forget to invest in a high-quality XLR cable for your mic. Most microphones don’t come with one out of the box, so you’ll have to buy one separately.
Step 7: Studio Monitors
Now is the time to take your monitoring capabilities to the next level.
Adding a pair of small studio monitors to your arsenal will transform your room into a fully functional home studio.
At this stage, you have everything you need to record audio, manipulate audio and monitor audio.
For a small budget studio setup, you don’t need a set of large 8-inch monitors. In fact, that would do you more harm than good at this stage.
Instead, a nice pair of 5-inch studio monitors will suit you just fine for now. What’s more important is the placement of your monitors.
You can’t simply plop your monitors on your desk and expect things to sound right. There are numerous guides online that are meant to help you with monitor placement, so check one of those out prior to setting them up.
Another important factor to getting the most out of your studio monitors is acoustic treatment. Which leads us to the next point.
Step 8: Acoustic Treatment
Sonic reflections are disastrous in home studio setup.
With no acoustic treatment, all of your recordings will be distorted and your audio playback quality will be untrustworthy.
This is due to the fact that home studios have a ton of sound waves bouncing off of every surface, thus creating an endless cycle of reflections. The result is an inaccurate reproduction of your source sounds.
Not only that, but poorly treated rooms ruin the integrity of your audio recordings, especially if you have a sensitive condenser microphone.
It doesn’t take a whole lot to treat your room at the beginning. Even throwing up a handful of acoustic panels on your walls and ceiling will go a long way towards combating sonic reflections.
The whole idea behind acoustic treatment is to absorb wild sound waves before they get out of hand. What you’re not doing is soundproofing your room entirely, which is a common misconception.
For more information on treating your room, check out this lengthy acoustic treatment guide. For now, drop some cash on a bundle of foam acoustic panels and get them mounted on your walls as soon as possible.
Additional Gear
MIDI Keyboard Controller
In the very early stages of a home studio, a MIDI controller isn’t entirely necessary. This is especially true if you’re on a tight budget.
That said, if you’re already a piano player, then you might feel more at home writing your arrangements on a MIDI keyboard. If that’s not the case, then save this step for later on down the road when you’re ready to learn how to play this type of instrument.
Mic Stand
To go along with your studio microphone, you’ll need a mic stand to keep it safe and secure. If you have a condenser microphone, this is even more important because they’re even more fragile than dynamic mics.
You can easily use a desktop mic stand or a boom arm in the early stages of your studio. Chances are you wouldn’t even have the room for a full-blown mic stand any way. Keep things simple for now.
Additional Cables
This was mentioned in the studio microphone step, but don’t forget to get yourself an XLR cable. On top of that, if you want to record an instrument like an electric guitar, then make sure you have enough ¼” TRS cables and headphone jack adapters for your audio interface.
Last Step: Have Fun With Your New Home Studio
So there you have it! That’s everything you need to build a budget-friendly home studio.
It’s really not as complicated as it may seem, which was clearly laid out in this article. It’s even easier when you break things down into steps that you can work towards over time.
The most important thing to remember is to have fun with this! You’re clearly trying to follow a passion of yours, so this whole process should be enjoyable and exciting.
With enough hard work and the right gear, you can make your passions a reality. Feel free to use this article as a reference point as you piece together your very own home studio.
We look forward to hearing your first track soon enough!
About The Author

Jeremy Bongiorno has been a musician for over 15 years. From touring the country in a 5-piece band, to producing his own sounds at home, he’s seen all sides of the industry. When he’s not working on a new song, you’ll most likely find him writing about all things related to home studios on his site Studio Frequencies.
Feat image by Soniq sounds on Unsplash